
Computer vision: image recognition and processing with OpenCV
The processing of digital images is one of the significant tasks in many research and science fields like remote sensing, astronomy, and Internet analysis. There are a lot of methods to perform this operation but today it generally requires distributed computing.
Being a complex subject and requiring a deep technical expertise from specialists, distributed computing involves a plenty of ways and algorithms that can be used for efficient processing of images. So, in this post, we will share our experience in digital image processing with OpenCV.
OpenCV is an open source computer vision library to process digital images. This large and popular library includes more than 2500 machine learning and computer vision algorithms to process images and videos as well.
Formulation of the problem:
Input: photo of soil with blue pellets on it
Output: detected pellets, computed density, evaluated distribution uniformity (evenness)
We had a photo of soil with blue pellets needed to be processed.
The overall scope included the detection of blobs, calculation of density, and evaluation of evenness.
- Pre-processing image
At the beginning, we had to detect blue pellets on the image. So the first step was to make them obvious to the blob detector, which works best with contrast images with minimal noise.
A perfect result at this stage is to get a binary image of the same resolution as an original one, where pellets become black and the background becomes white.
So we needed some sort of a metric to evaluate the relevance of pixel with a maximum of blue pellets and close to zero on background zones. For solving this task, we used the following formula where r, g, b correspond to red, green and blue values of each pixel [0; 255]. Take a look
relevance = b – (r+g)/2
0 <= relevance <= 255
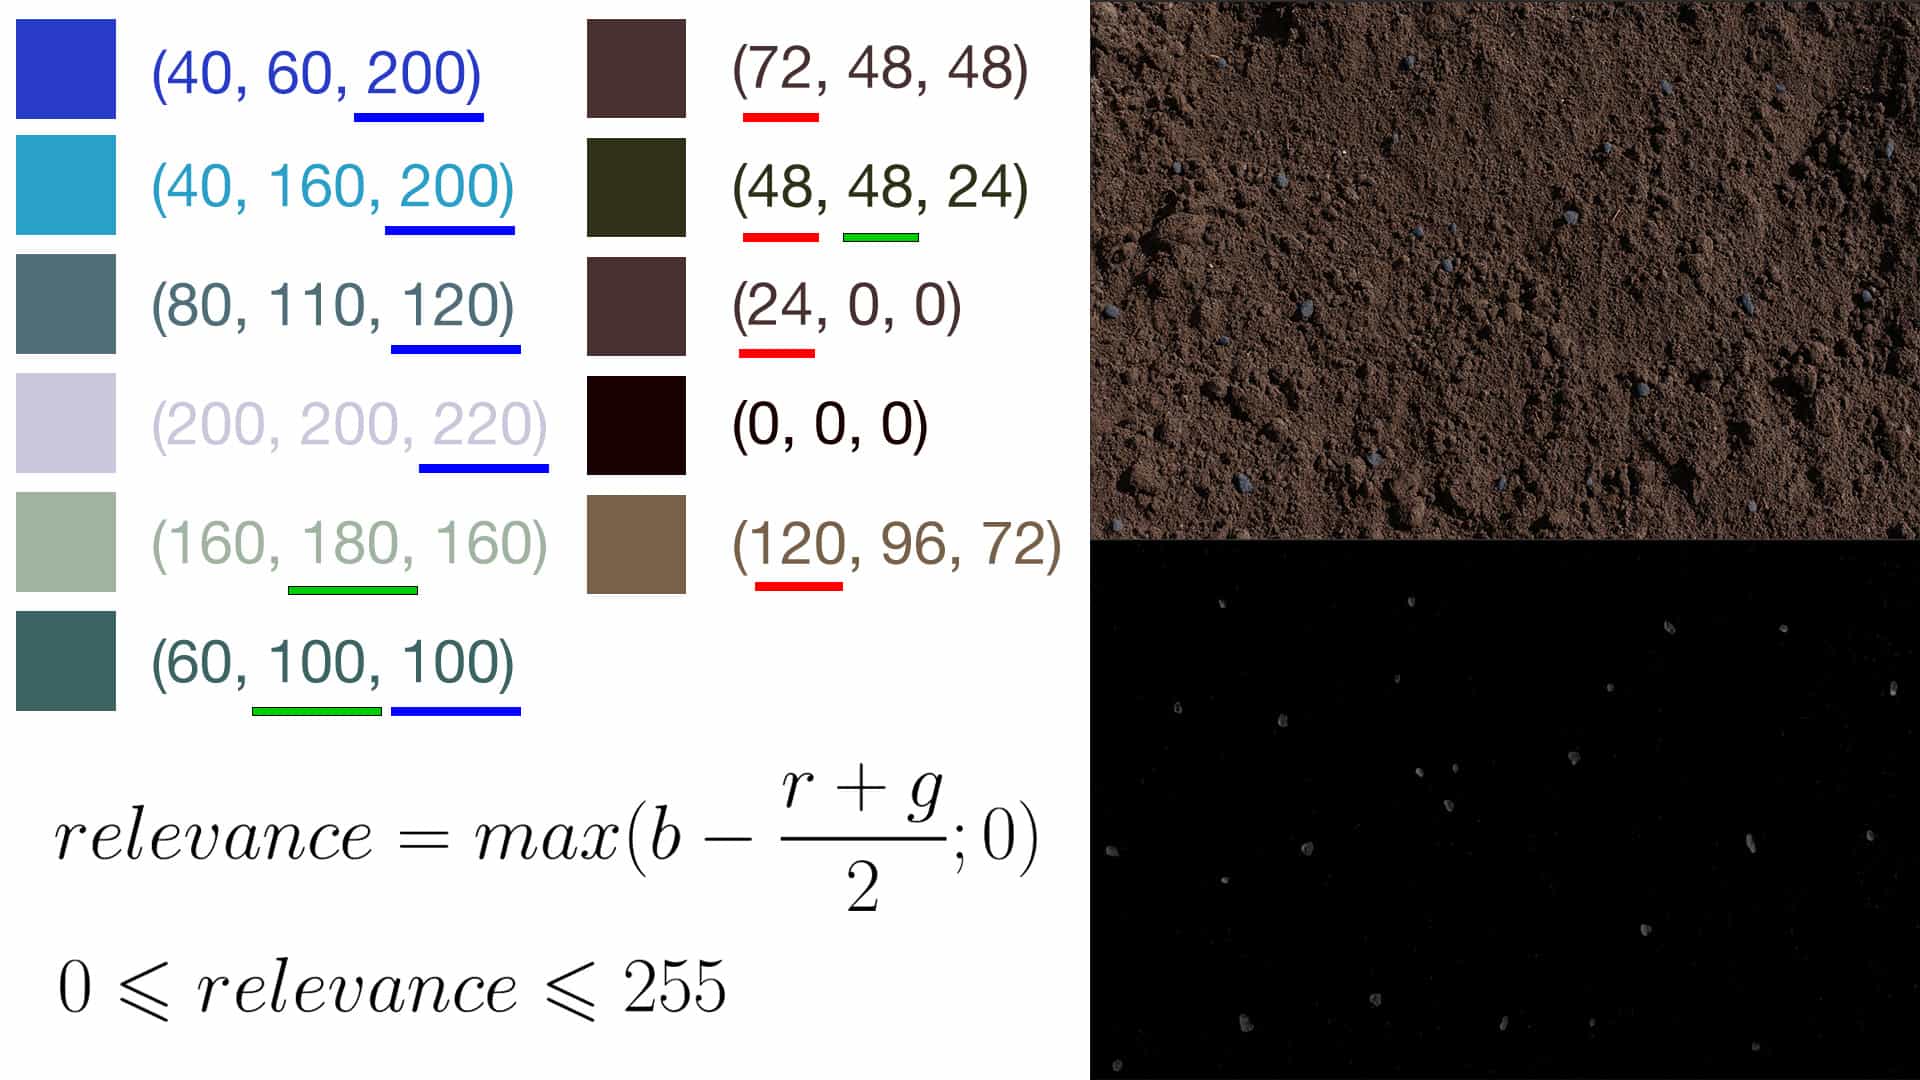
This would produce a gray image rather than a binary, but we could use a threshold function to bring the contrast up and simplify the job for a Blob Detector.
- Detect blobs
A few words of introduction. A blob is a region of an image (a group of connected pixels) shares some common properties. The main objective of blob detection methods and algorithms is to detect image regions that differ in these properties.
Here we decided to use OpenCV approach as a SimpleBlobDetector class, based on a rather simple algorithm, which includes the following steps:
- Thresholding
- Grouping
- Merging
- Center & Radius Calculation
Also, we chose this open source library for digital image processing as it ensures a convenient and simple way to detect and filter blobs based on different characteristics.
Thus, at this stage we had the following tasks to complete (correspond to the four steps mention above):
- Convert a source image to binary images by using thresholding with several thresholds
- Extract connected components from the binary images by finding Contours and defining their centers
- Group these centers from several binary images with the help of their coordinates. Then to close them (centers) form one group that corresponds to one blob
- Evaluate the final blobs’ centers and their radiuses, and return as locations and sizes of the key points.
This step is pretty simple since the algorithm is implemented in SimpleBlobDetector class (OpenCV), so everything we had to do there is to set appropriate parameters.
There is an option to filter blobs by area, color, the ratio of the minimum inertia to a maximum one, convexity, and circularity. We turned off all these filters except `area` to handle some possible noise, which is usually less than 4 pixels.
The pellets had approximately the same size and if some too small or large blobs would be detected, we should exclude them. We made that with the help of additional filtering average values.
First, we calculated an average blob size and those values that didn’t belong to [0.3 * average; 2 * average] interval were excluded.
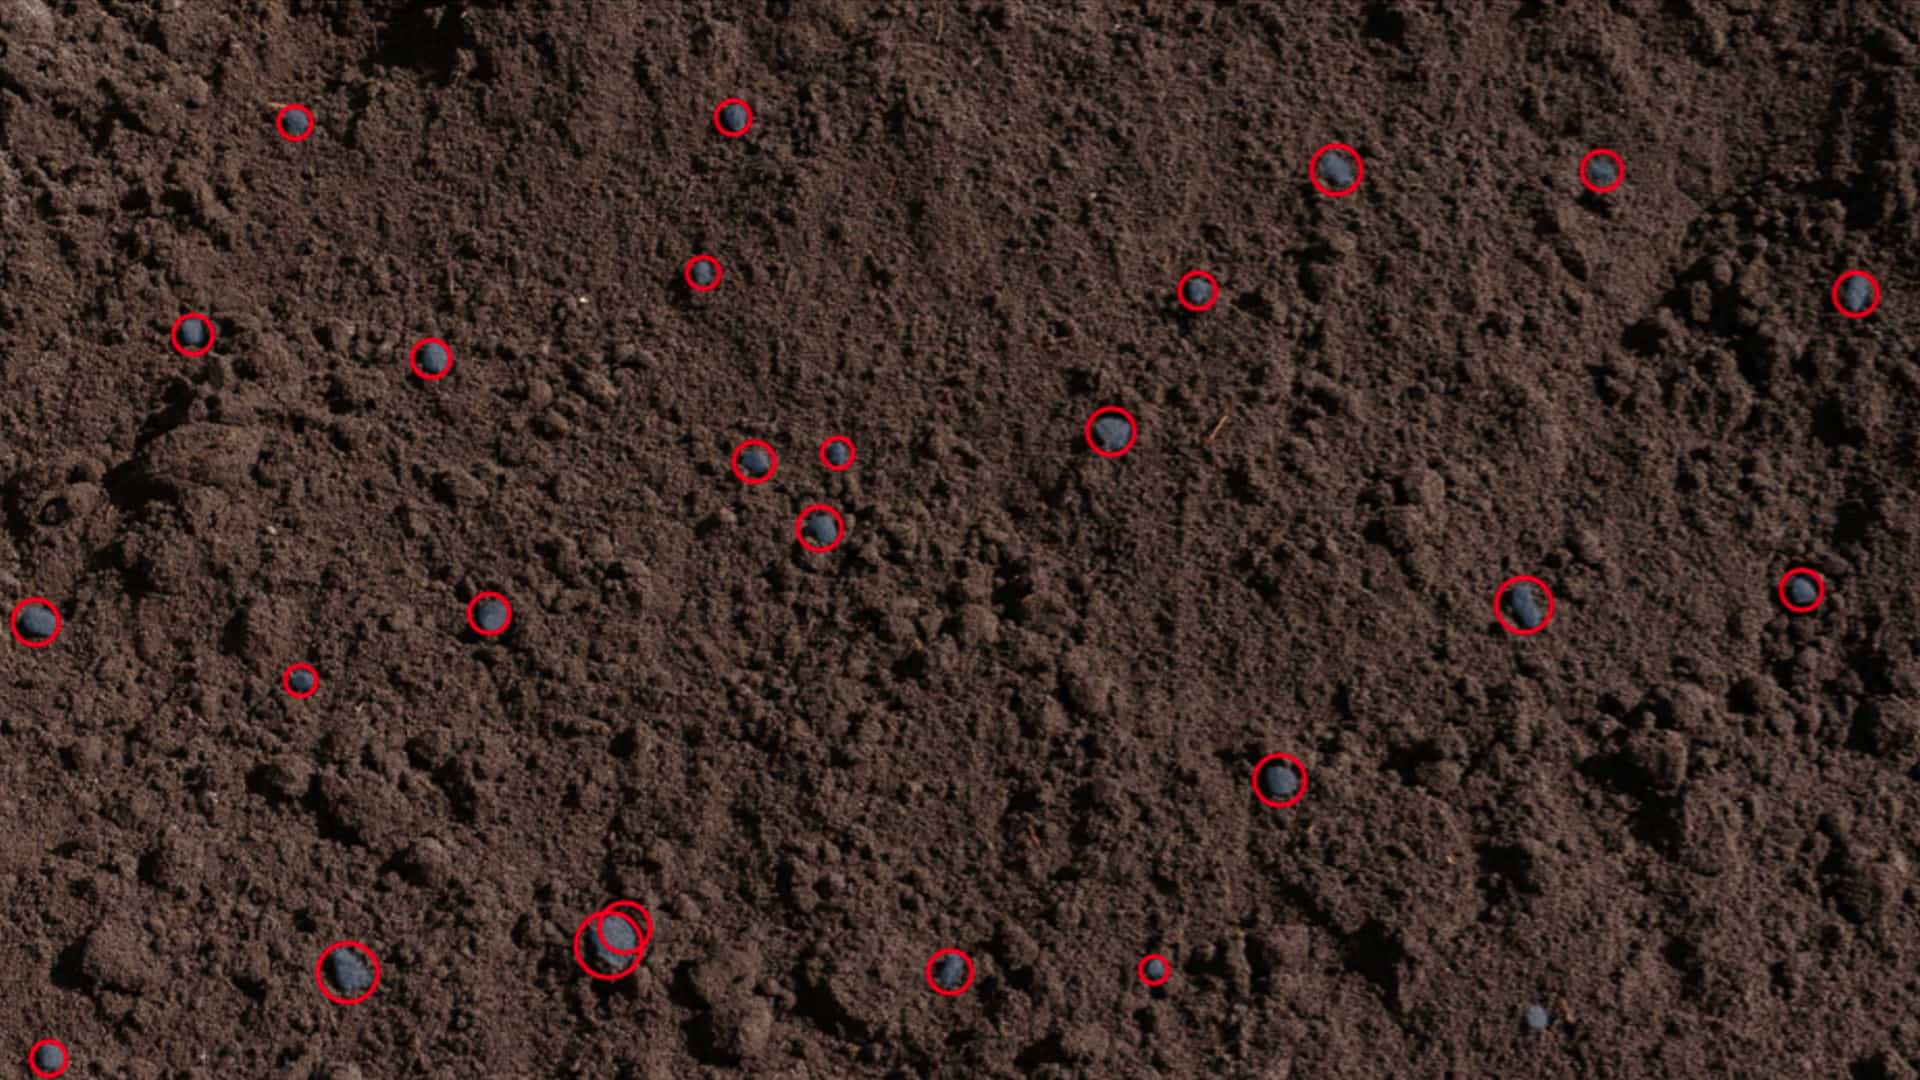
The result of this stage:
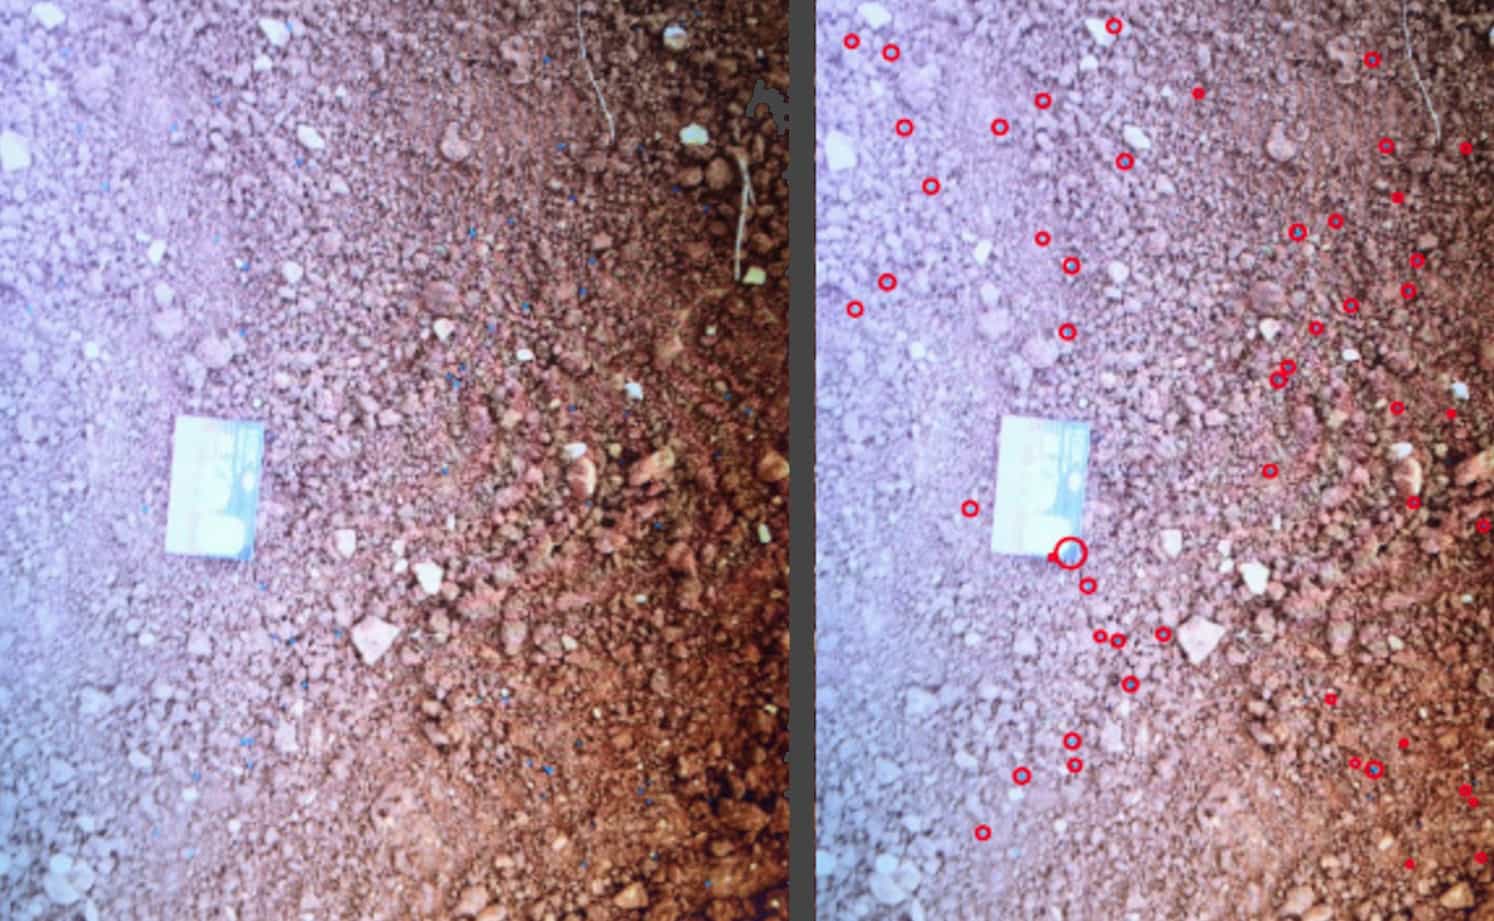
Here is another a real-world example, where we tested 10 blue paper pieces in a flower pot instead of pellets on the soil. All papers were detected perfectly, though this was a rather simple task since there were much bluer in relevant zones than in the rest of the image.
- Density
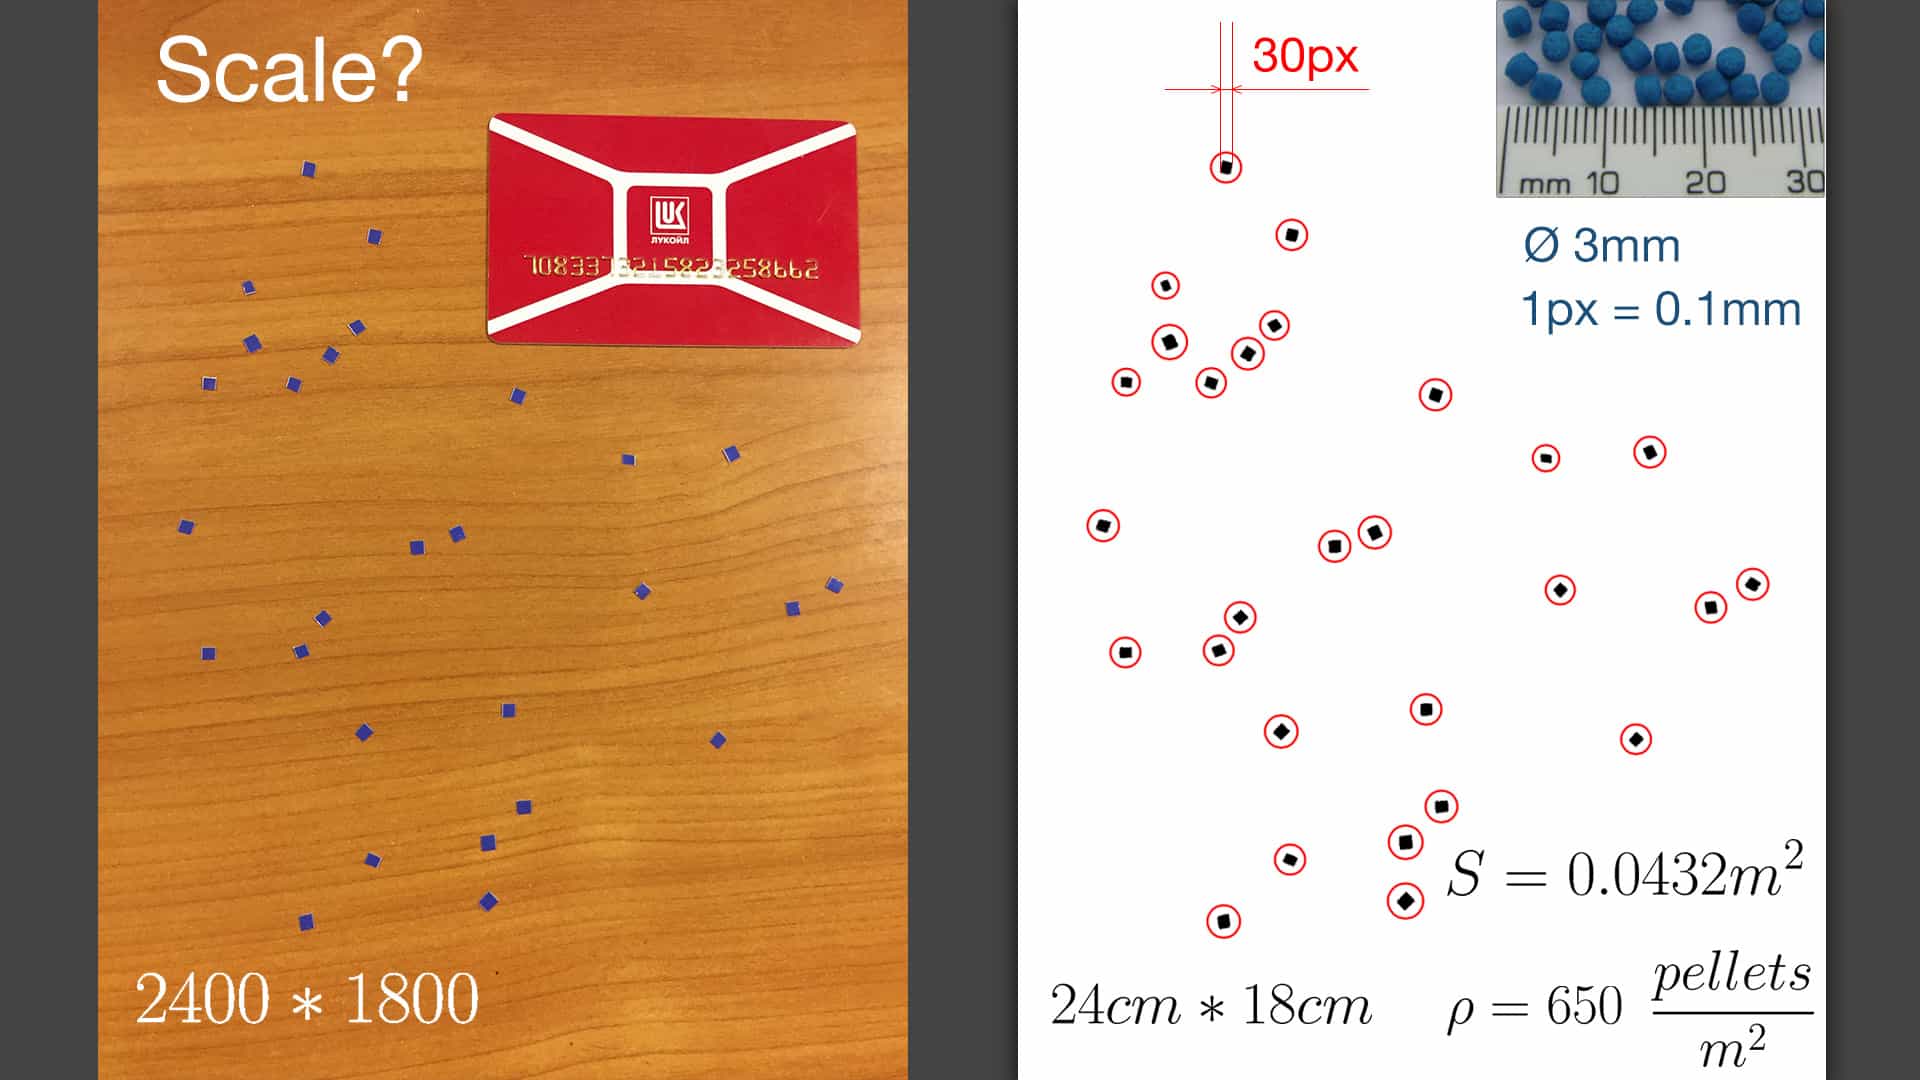
The next step was to calculate density, so we needed to know the number of pellets and the area of image in square meters: density = N/A
How could we know the real area of the image?
Well, we knew that pellets had a diameter of 2.5-3mm, and from the previous stage we knew the average size of detected blobs. So we could calculate the scale of the image and thus convert a width and height from pixels to meters. Take a look:
- Evenness (uniformity)
So, we knew the coordinates and radiuses of detected pellets as well as their density, but from a practical point of view, distribution quality depends on its evenness as much as it depends on its density.
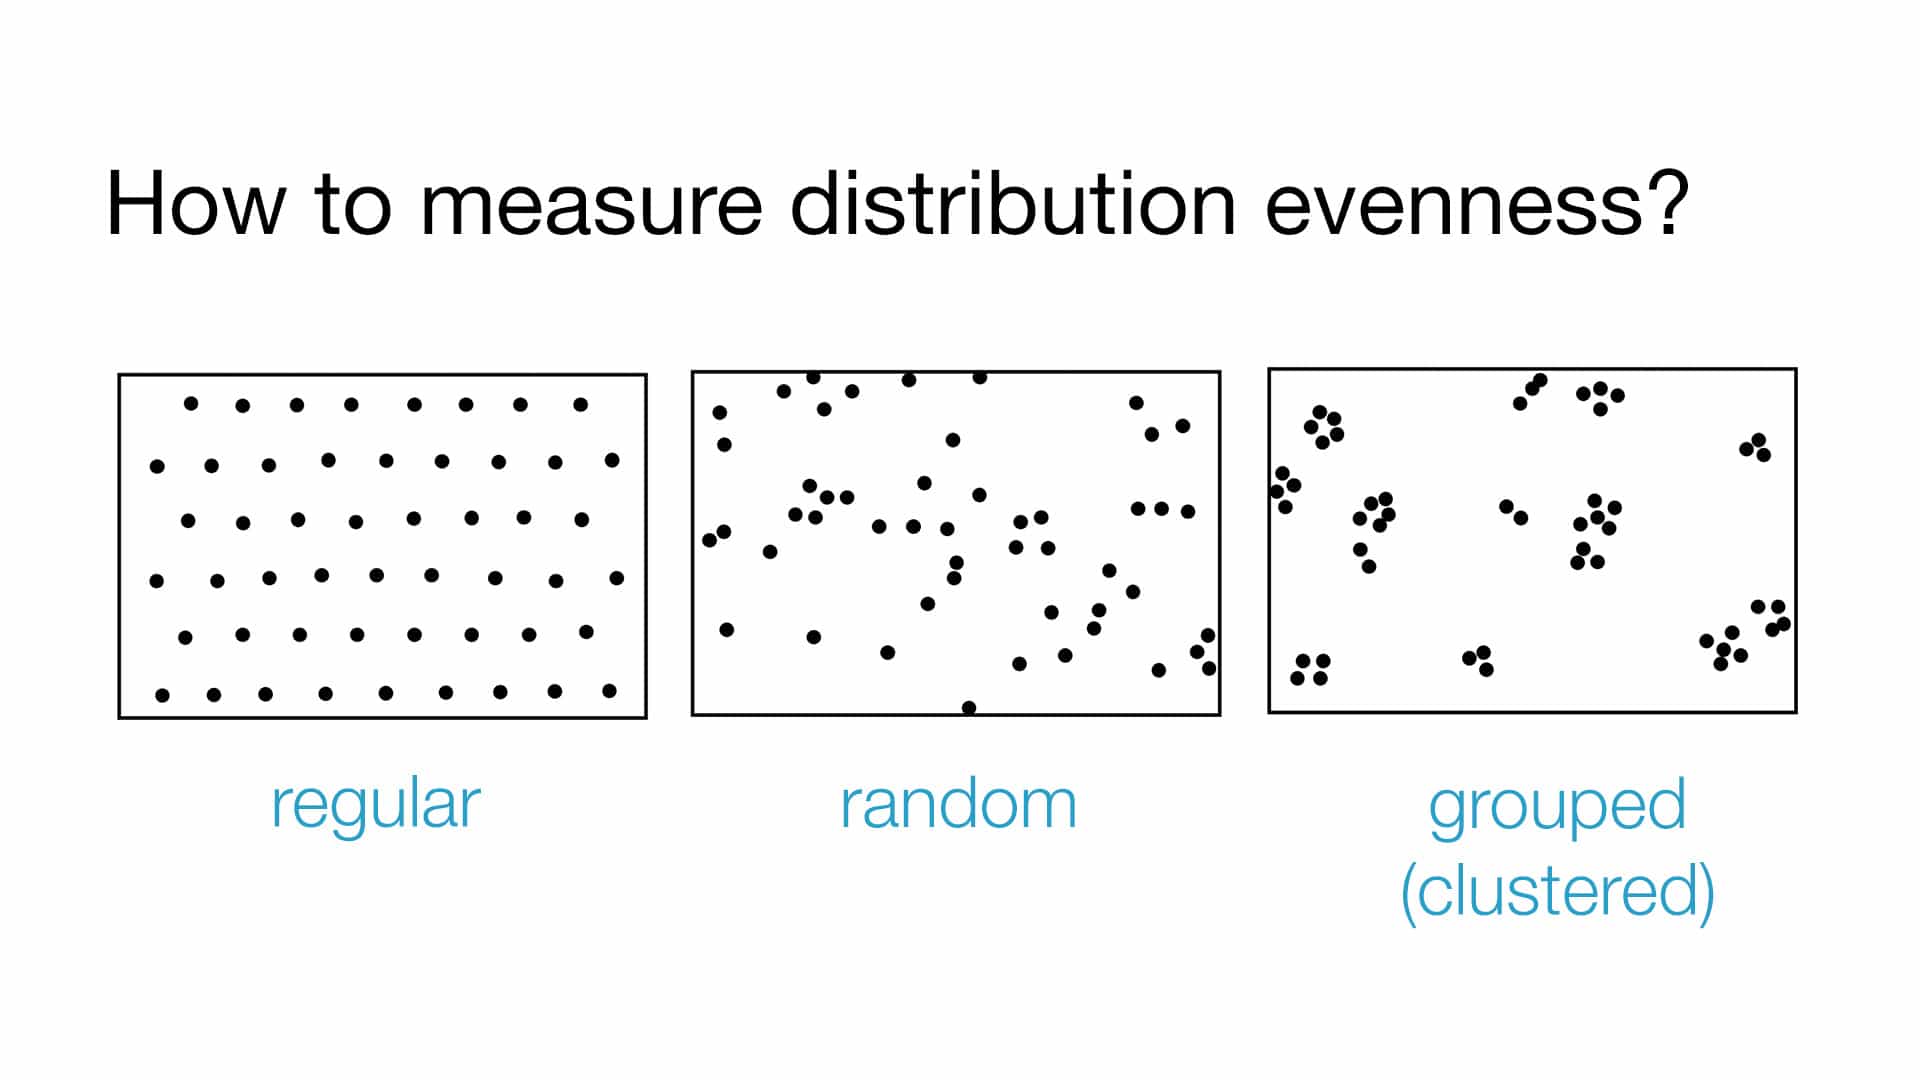
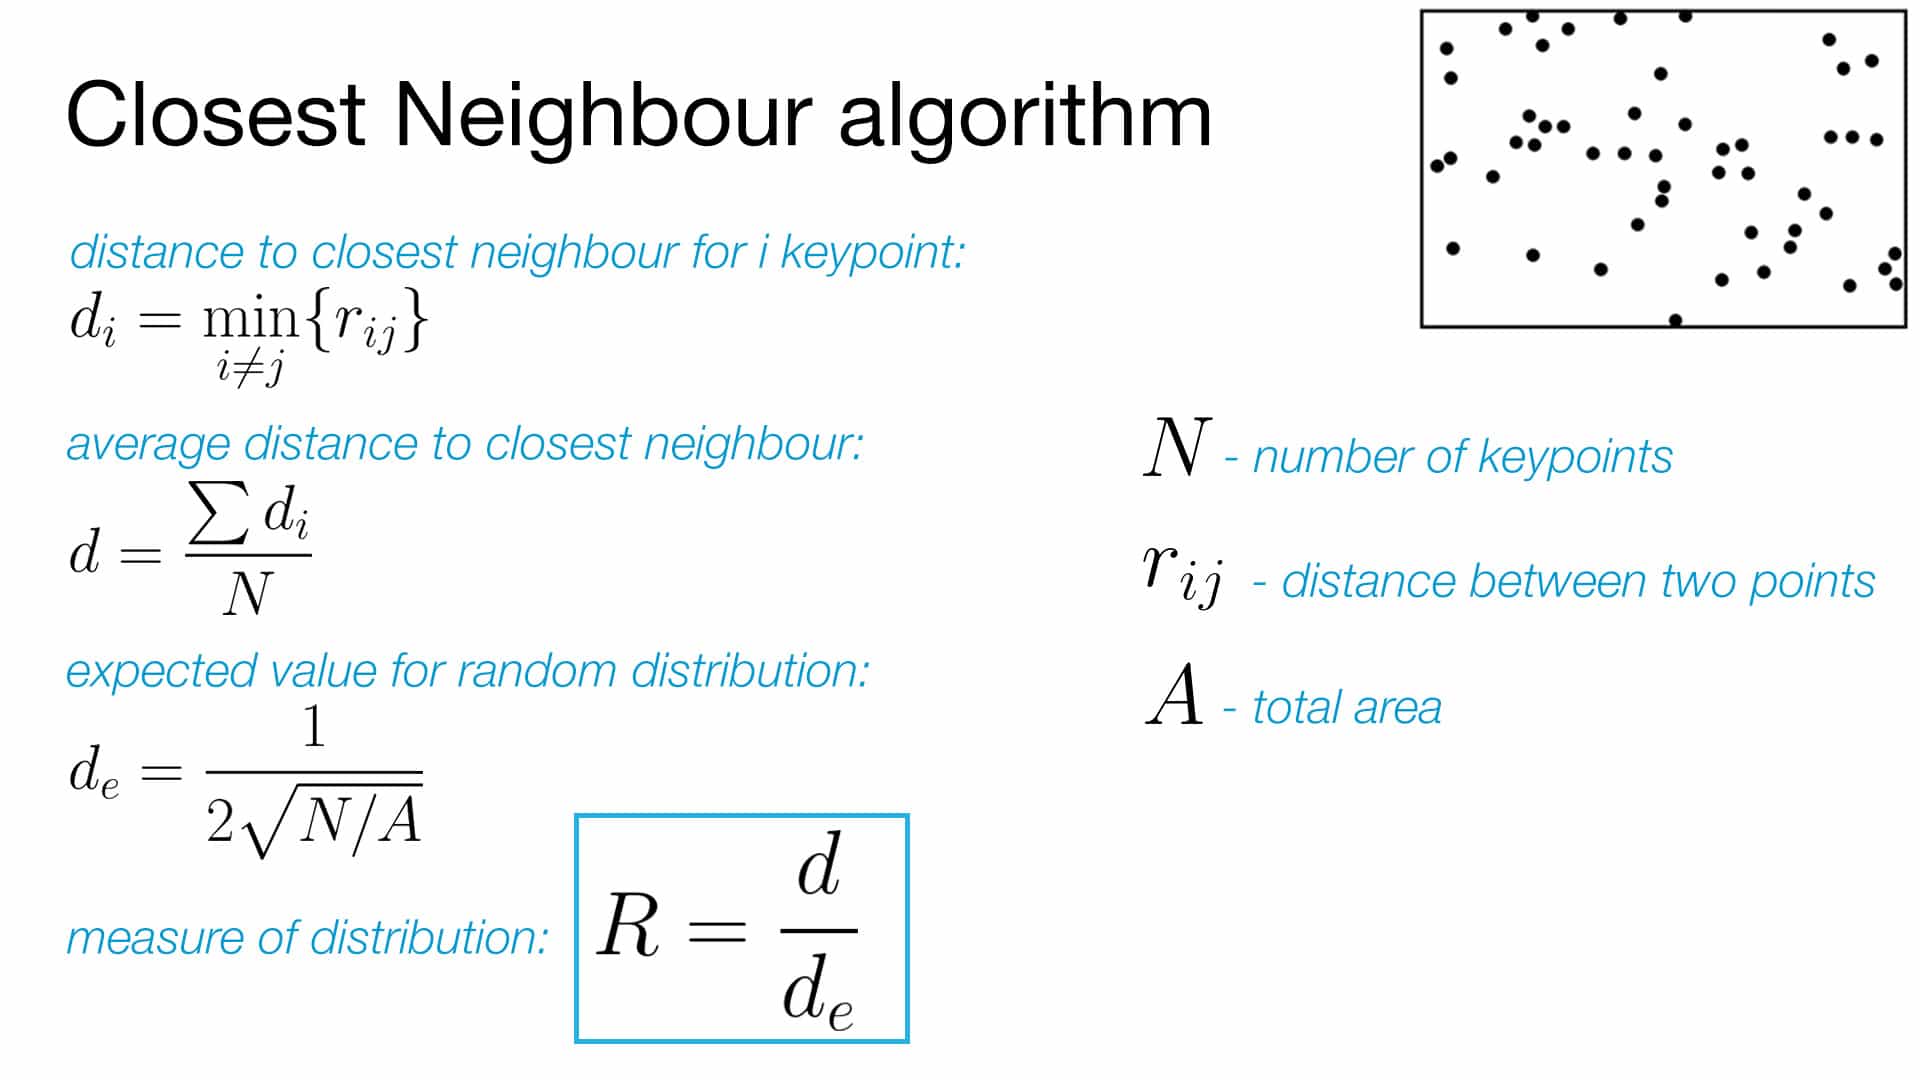
We needed to evaluate a distribution uniformity with some metric, which would be close to 0 for highly grouped distribution and close to 1 for uniformly located pellets. For that purpose, we used Closest Neighbour algorithm (Slide 14) to:
- Find a distance to the closest neighbor for each point
- Calculate average of the values from the first step
- Calculate expected value for random distribution: 1/(2*sqrt(N/A))
- Divide result from step 2 by the result of step 3
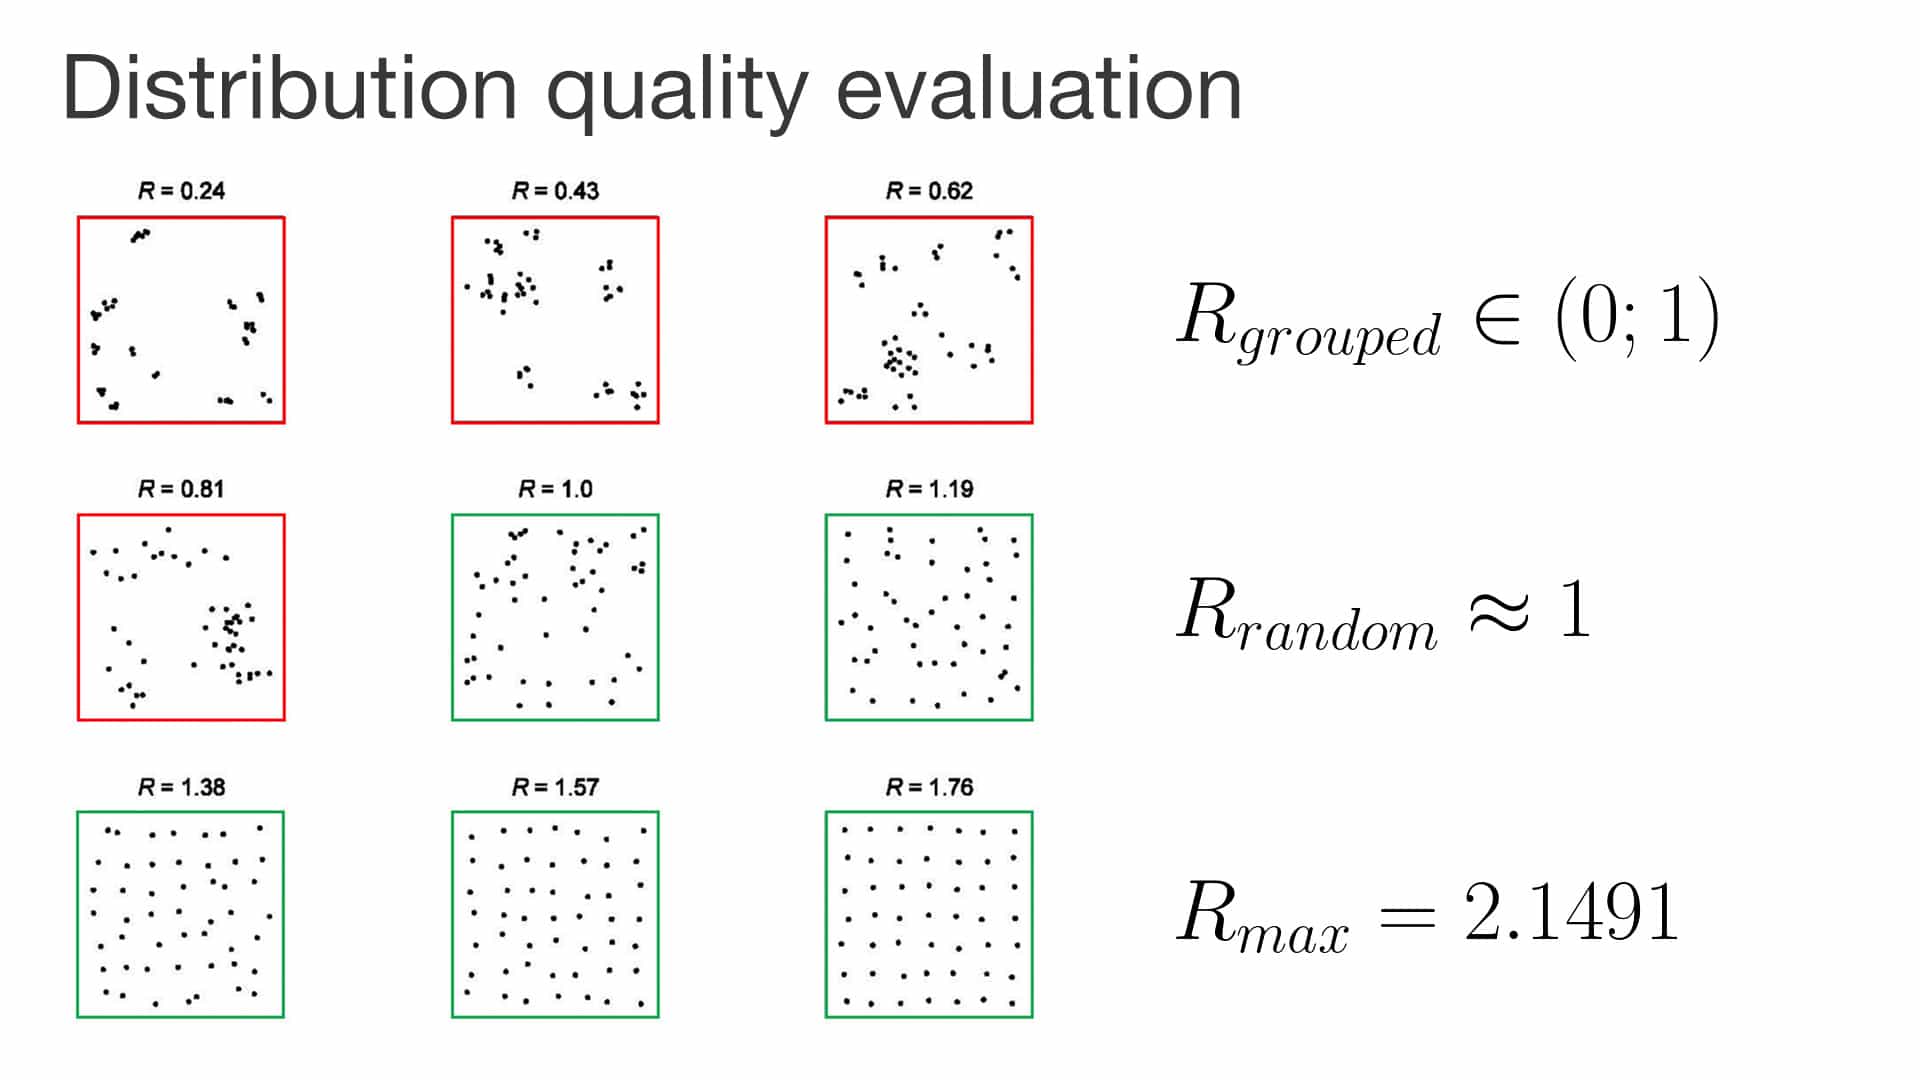
The received metric belongs to interval [0; 2,1419]
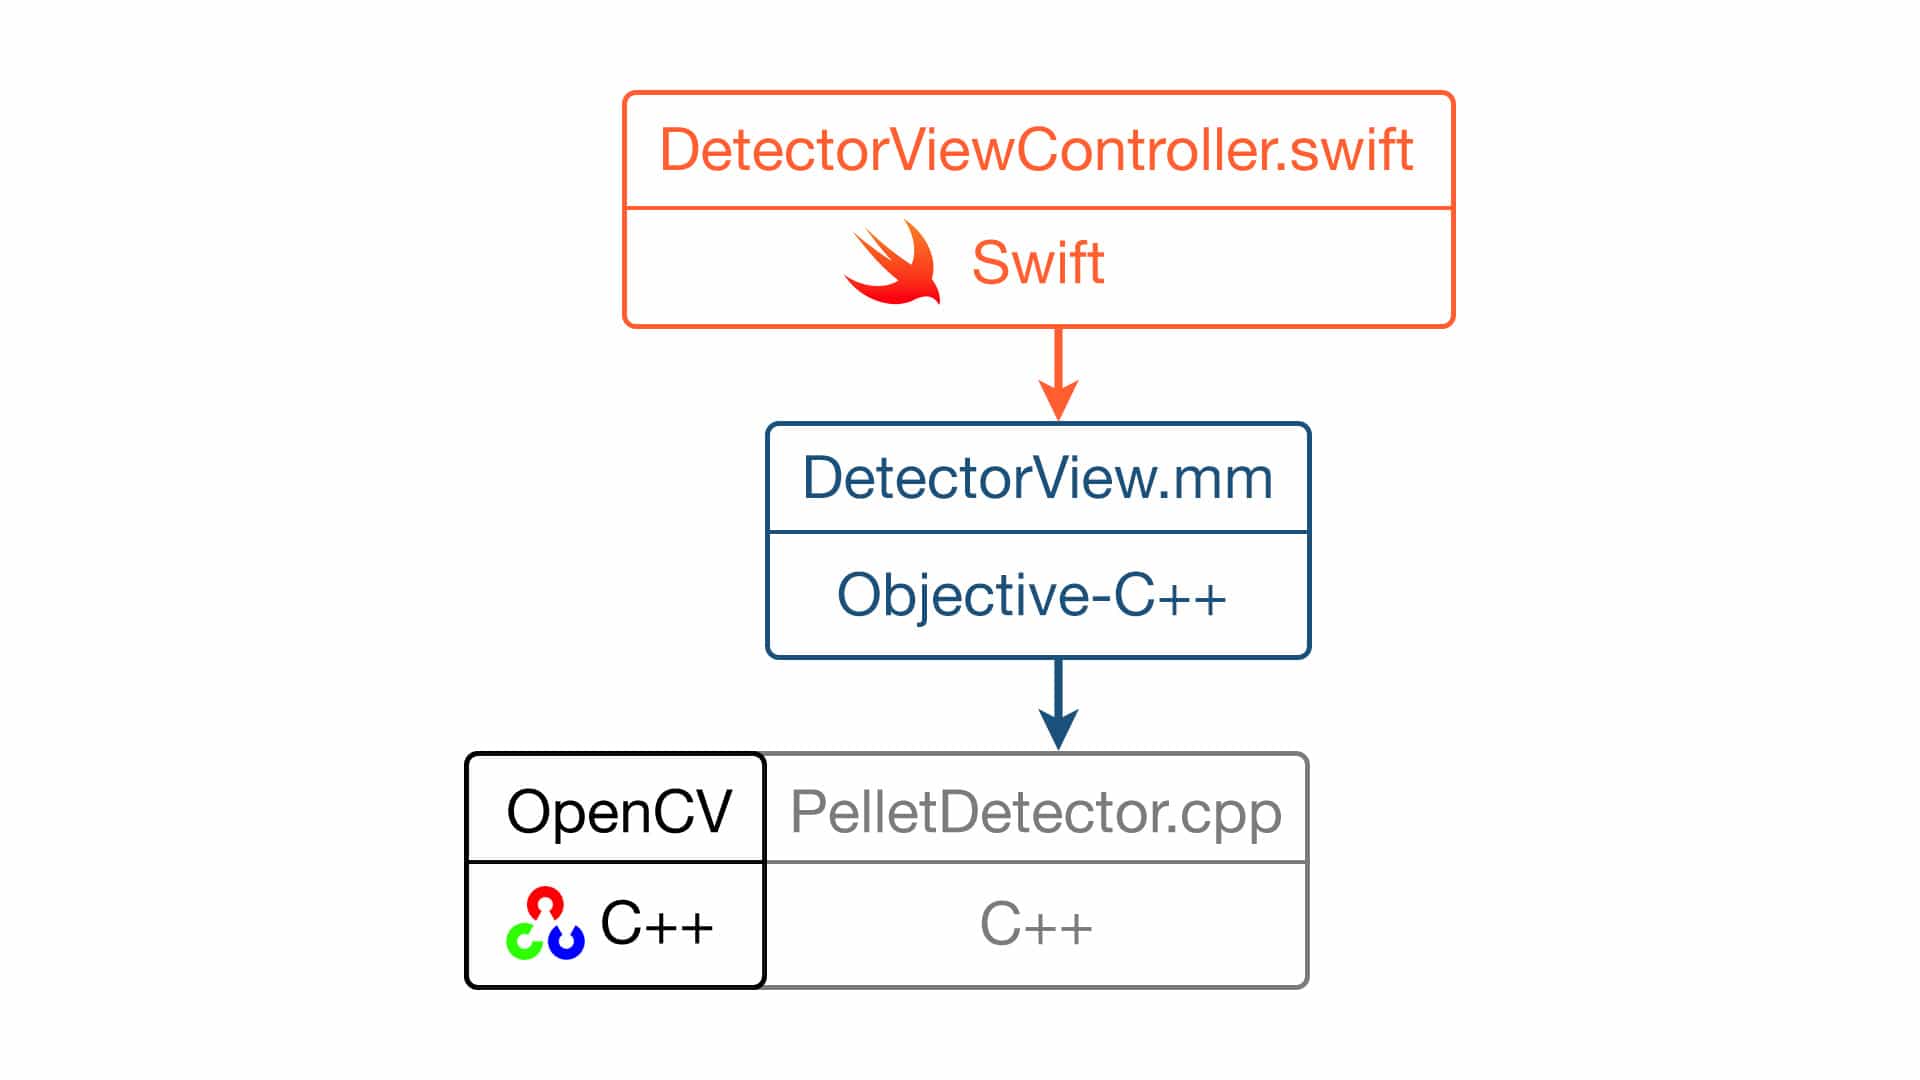
Project architecture:
- The described algorithm was implemented in C++ and used OpenCV framework, which was also written in C++.
- DetectorView was implemented in Objective-C++ and was a subclass of UIView
- The rest of the iOS project was written in Swift and used Objective-C code via bridging header
Hope, the article has been useful to you. If you have comments, questions, please, ask, and share your experience in digital image processing with OpenCV in comments.). If you have a project idea, apply to a reliable software development company and get a free consultation!